Using Your First VPN
In under 5 minutes, this article will guide you through the process of installing and using your first VPN!
For the purpose of this guide, it's assumed that you are completely new to VPNs, or are feeling unsure about the process of choosing and setting up a VPN. If this isn't the case, check out our list of the most popular VPN providers.
In this guide, we'll be buying and installing Private Internet Access. PIA is the most popular provider around today, and is well respected in the VPN community. It has servers in multiple countries, does not store logs of your activity, and despite being simple to set up and use, provides very good encryption and security. At $6.95/month ($3.33/month if paid yearly) it is also one of the cheapest VPNs available. Additionally, they support OpenVPN, L2TP/IPSec, and PPTP (don't worry if you don't know what any of those acronyms mean!).
Firstly, head over to PrivateInternetAccess and purchase either 1 month, 6 months or 12 months. If you're uncertain how long to pay for, choose one month: it costs only $7 (around €6.60 or £5.60) and is non-recurring, so you have no obligation to continue once your month is up.
Once you've purchased your VPN, you will receive an email containing links to installers for their Windows and Mac OS X clients, as well as an automatically generated username and password. Don't forget to write down the username and password!
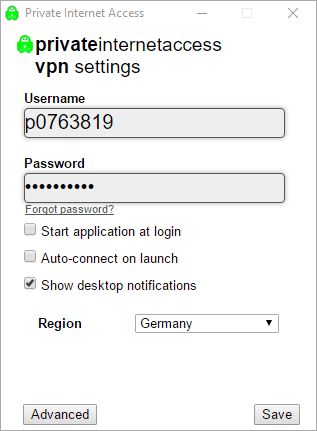
If you want a hassle-free experience, using their client is the best option. Download and install the client via the link they emailed to you. Once it's installed, run the software and the following window will appear:

This is the PrivateInternetAccess VPN client. The client gives you two options:
Start Application at Logon. Tick this if you want the client to open automatically when you start the computer. Otherwise, leave it unticked.
Auto-Connect When App is Started. Tick this if you want to automatically connect to the VPN when the client is started. Otherwise, leave it unticked.
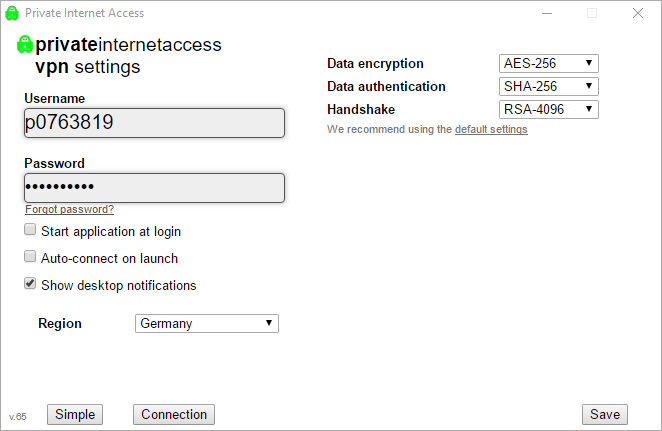
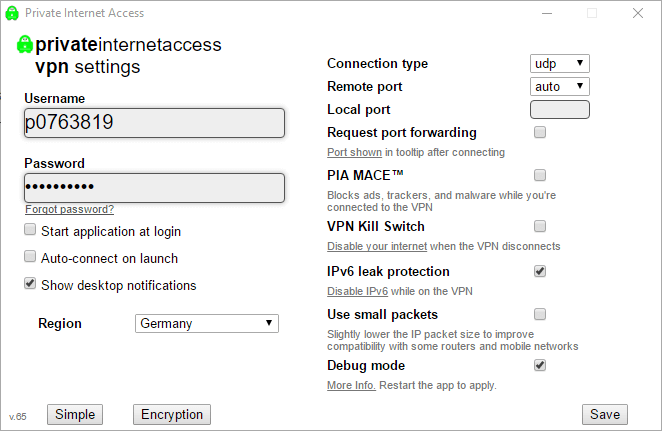
If you click on the "Advanced" tab, options for Connection and Encryption settings are shown.


It is generally advised to keep the defaults for these settings, although they can always be modified later.
VPN Kill Switch — this setting disables your Internet access when the VPN disconnects. Normally, if the VPN were to suddenly disconnect, your true IP address would be exposed to websites you were browsing through the VPN previously, or to services you were connected to. With the Kill Switch enabled, this risk is eliminated.
Enabling the Kill Switch can cause connectivity issues as it requires that PIA modify your Windows network settings, so tread carefully.
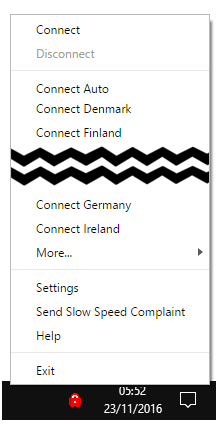
Press Save, and a small icon will appear in your system tray (bottom right of your desktop).
This is where PIA lives while it's running. It's red when the VPN is disabled, and green when the VPN is running. Right-click the icon, and a large list of countries will appear. These are locations with PrivateInternetAccess servers available. Click a country, and PIA will then connect to the VPN. It might take a few seconds, so be patient!

If all goes well, the icon should eventually turn green, and...
That's it!
You're connected to the VPN. Your IP address is hidden; websites you connect to will see the IP address of the VPN server, not your true IP. You can surf the internet anonymously – bypassing any blocks and restrictions. Your browsing, downloading, and streaming cannot be monitored by your ISP, government, or workplace; they will see you are using a VPN, but the traffic itself is encrypted.To disconnect, simply right-click the icon and click Disconnect. The icon will turn red, and you can then click Exit to close the client.
You can watch content normally restricted to certain countries, by choosing that country from PIA's list – for example pick Connect US California to watch videos restricted to America, and so on. You will be able to access content from Hulu, Netflix, Pandora, BBC iPlayer, YouTube, and many others.
Some sites, such as Netflix, try to block VPNs by blacklisting IP addresses from known VPN servers. To get around this, simply disconnect the VPN, then try to connect to the same country – you'll connect to a different server with a different IP, hopefully one that is unblocked!
Advice & cautions
- Avoid using sensitive sites using the VPN – for example your bank. Banks are very careful; each time you login to online banking, they look at your IP address to see what country you are connecting from. They do this to protect against fraud. If you suddenly appear to be connecting from another country, they may refuse your login attempt, or even suspend your account pending verification of your identity. While connected to the VPN, avoid using online banking, PayPal, or websites such as Amazon or eBay.
- Clear browsing data before and after using the VPN — most websites use cookies to store user information such as settings, or to track and uniquely identify users. If you visit a website through the VPN that you have previously visited, without clearing your cookies, you lose your anonymity. Clear your cookies, cache, and download/browisng history before using the VPN.
- Don't visit sites you're logged in to — this almost goes without saying, but if you visit Facebook while signed in as John Smithson and connected to the VPN, you're telling Facebook who you are! What's more, you could potentially deanonymise yourself entirely; Facebook tracks you across the web, and with the VPN IP address you've kindly given them, they could snoop at the sites you have been browsing. This doesn't apply to just Facebook, but any site with your personal information. If you clear your cookies, as above, your browser will be logged out of any websites.
- Don't think using a VPN will make you 100% anonymous at all times — it won't. It might protect you from your ISP, your school, your parents, your workplace or simple government surveillance, but if you are a big enough target that you are being personally monitored by a sufficiently equipped state actor (e.g. the US government), they can likely find a way to uncover your true identity, for example via JavaScript/Flash exploits or specific software vulnerabilities. Tor provides better anonymity than VPNs, provided you disable JavaScript and use the Tor Browser Bundle.